

How to Steam Milk for Latte at Home
Table of Contents
- What You'll Need to Steam Milk for Latte
- Best Milk for Latte Art and Steaming
- Step-by-Step Steaming Process
- Latte Milk Temperature Guide
- How to Froth Milk Without a Wand
- Common Mistakes to Avoid
- Cleaning and Maintaining Your Equipment
- Frequently Asked Questions
Last Updated: September 25, 2026
What You'll Need to Steam Milk for Latte
To steam milk for latte at home, you need the right equipment. The most common setup uses an espresso machine with a steam wand. However, you have several options depending on your budget and equipment.
Steam wand and espresso machine setup
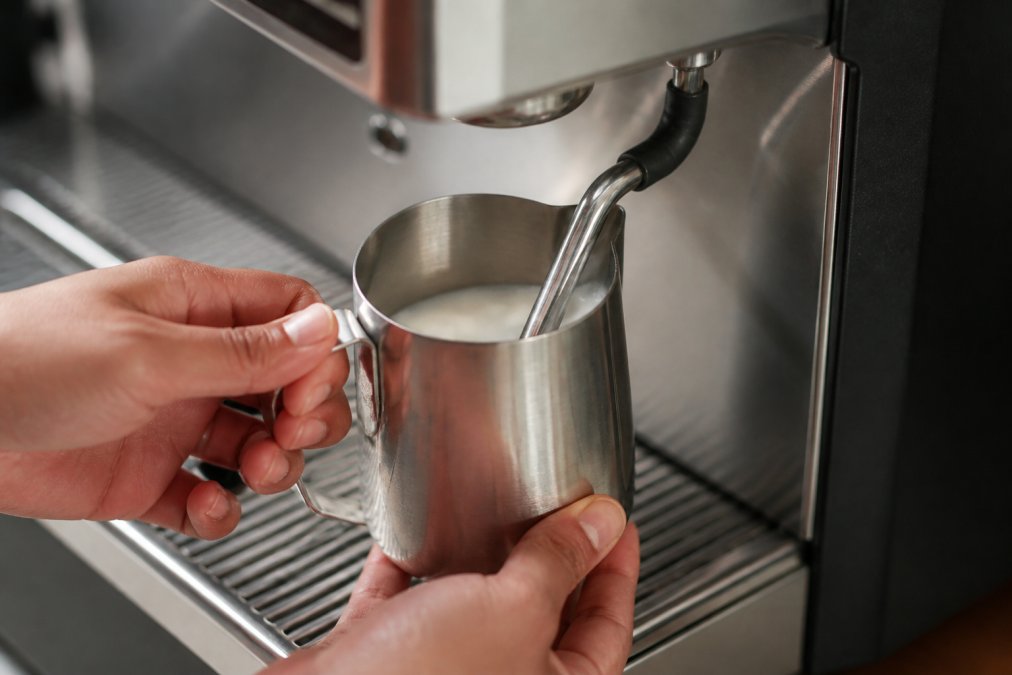
A steam wand is the metal pipe attached to your espresso machine. It delivers pressurized steam that heats and froths milk. This is the professional method used in coffee shops.
The steam wand works by forcing hot steam through cold milk. The pressure creates aeration, which adds tiny bubbles to the milk. This process builds microfoam, the velvety texture that makes great latte art possible.
When choosing an espresso machine, look for one with adequate steam pressure. Most quality machines produce 9+ bars of pressure, which is sufficient for milk steaming. The wand should have a single or dual hole opening for better control.
Manual frothing alternatives
Not everyone has an espresso machine. Manual frothers give you microfoam without expensive equipment.
Common manual options include:
- Immersion blender - Fast and effective for small amounts
- Jar shaking method - No equipment needed beyond a jar with a lid
- Whisk and pan approach - Traditional method using basic kitchen tools
- Handheld milk frother - Battery-powered device that whips milk into foam
Each method produces different results. The immersion blender creates dense microfoam quickly. Jar shaking takes more effort but works well. The whisk method is slowest but teaches proper technique. Handheld frothers are convenient but produce thinner foam.
Best Milk for Latte Art and Steaming
Not all milk froths equally. The milk you choose dramatically affects your results. Understanding milk composition helps you pick the right option for your latte.
Why whole milk works best
Whole milk is the standard choice for latte art. It contains more milk fat and protein than lower-fat options. These components are essential for creating stable microfoam.
The fat in whole milk helps create a smooth, velvety texture. The protein provides structure that holds bubbles together. Together, they produce the microfoam that makes latte art possible.
Whole milk typically contains 3.25-3.5% fat. This fat content is ideal for steaming. It creates a glossy surface and silky mouthfeel that low-fat milk cannot match.
When you steam whole milk, the fat and protein interact with heat and air. This creates tiny, uniform bubbles. The result is microfoam that pours smoothly and holds its shape.
Plant-based milk steaming guide
Plant-based milks have become popular, but they steam differently than dairy milk. Oat milk, almond milk, soy milk, and coconut milk each behave uniquely.
Oat milk is the easiest plant-based option to froth. It contains natural starches that help create microfoam. The texture is similar to whole milk when steamed properly.
Soy milk froths well but requires careful temperature control. It can curdle if overheated. Watch the thermometer closely and stop steaming at 150-160 degrees Fahrenheit.
Almond milk and coconut milk are harder to froth. They contain less protein and fat than oat or soy milk. The foam tends to be thin and dissipates quickly.
For best results with plant-based milk:
- Choose barista-blend versions designed for steaming
- Keep the milk very cold before steaming
- Avoid overheating, which breaks down plant proteins
- Use a thermometer to monitor temperature precisely
USM Coffee's carefully sourced beans pair beautifully with any milk you choose. Whether you prefer whole milk or oat milk, quality espresso makes the difference in your final latte.

Step-by-Step Steaming Process
The steaming process requires proper technique and attention to detail. Follow these steps to create microfoam consistently.
Starting with cold milk
Begin with cold milk, ideally between 35-40 degrees Fahrenheit. Cold milk is easier to texture and creates better microfoam. Warm milk froths poorly and produces large, unstable bubbles.
Pour milk into a stainless steel frothing pitcher. Fill it one-third to one-half full. Overfilling prevents proper aeration and makes the whirlpool effect impossible.
Position the steam wand just below the milk surface. The tip should barely touch the top. Turn on the steam and listen for a gentle hissing sound, not a loud screech.
Creating the whirlpool effect
The whirlpool effect is the circular motion of milk in the pitcher. This motion distributes heat evenly and incorporates air throughout the milk.
To create the whirlpool, angle the pitcher slightly. Position the steam wand off-center, pointing toward the pitcher wall at an angle. The steam pressure creates a circular motion.
The whirlpool should spin smoothly and steadily. If the milk splashes or moves erratically, adjust the wand position. The goal is smooth, continuous rotation.
As the whirlpool forms, gradually lower the pitcher. Keep the steam wand tip just below the surface. This incorporates air and creates aeration.
Monitoring texture and aeration
Watch the milk surface throughout steaming. You should see the milk level rise as you add air. This rise indicates proper aeration and bubble incorporation.
The milk should feel warm to the touch after 10-15 seconds of steaming. By 20-30 seconds, it should be noticeably hot. Continue steaming until you reach the target temperature.
Listen to the sound as you steam. A gentle hissing means you're adding air correctly. A loud screech means the wand is too deep. A silence means the wand is too high.
Feel the pitcher temperature with your hand. When it becomes too hot to hold comfortably, you're approaching the target temperature. This tactile feedback helps you develop consistency.
Latte Milk Temperature Guide
Temperature control is critical for proper milk steaming. The right temperature creates the best texture and flavor.
Target temperature range
The ideal milk temperature for lattes is 150-160 degrees Fahrenheit. This range creates microfoam without scalding the milk. Milk heated above 160 degrees loses its sweetness and develops a burnt taste.
At 150 degrees, the milk is hot but still retains natural sweetness. The proteins haven't fully denatured. The foam is velvety and pours smoothly.
At 160 degrees, you reach the upper limit. The milk is hot enough for a quality latte. Beyond this point, flavor deteriorates quickly.
Avoid heating milk above 170 degrees. This temperature causes the milk to break down. The foam becomes thin and unstable. The taste becomes sharp and unpleasant.
Using a thermometer effectively
A thermometer removes guesswork from temperature monitoring. Clip-on thermometers attach to the frothing pitcher and show real-time temperature readings.
Position the thermometer on the side of the pitcher, submerged in the milk. It should read the milk temperature, not the steam temperature.
Watch the thermometer as you steam.
How to Froth Milk Without a Wand
You don't need an espresso machine to create microfoam. Several methods produce excellent results with basic equipment.
Immersion blender technique
An immersion blender is the fastest method for frothing milk without a steam wand. It creates microfoam in 30-45 seconds.
Jar shaking method
The jar shaking method requires no electricity and minimal equipment. It takes 1-2 minutes but produces reliable microfoam.
Whisk and pan approach
Using a whisk and pan is the most traditional method. It develops your technique and requires only kitchen basics.
Common Mistakes to Avoid
Even experienced users make steaming mistakes. Understanding common errors helps you improve quickly.
Overheating and texture breakdown
Overheating is the most common mistake. Milk heated above 160 degrees loses sweetness and develops a burnt flavor. The proteins break down, and the foam becomes thin and unstable.
Incorrect steam wand positioning
The steam wand position determines aeration and texture. Positioning errors prevent proper microfoam development.
Troubleshooting large bubbles and inconsistent microfoam
Large bubbles indicate improper aeration. They form when air is added too quickly or when the whirlpool is disrupted.
Cleaning and Maintaining Your Equipment
Proper maintenance keeps your equipment functioning well. Milk buildup damages steam wands and reduces performance.
Steam wand purging and wiping
Purge the steam wand immediately after steaming. Hold a small cup under the wand and activate the steam for 2-3 seconds. This forces out milk residue before it dries.
Deep cleaning to prevent milk buildup
Weekly deep cleaning keeps your wand in top condition. Soak the wand in hot water for 10-15 minutes. This softens any dried milk.
Frequently Asked Questions
What is the best milk to use for steaming and latte art?
Whole milk is the gold standard for steaming because its higher fat and protein content creates stable microfoam and holds latte art longer. The milk fat coats your mouth with a velvety texture, while proteins absorb steam and create fine bubbles. If you prefer plant-based options, oat and soy milk steam reasonably well, though they require slightly different technique and won't hold latte art as long as whole milk does.
How hot should milk be steamed for a latte?
Steam milk to between 150-160 degrees Fahrenheit for optimal taste and texture. At this temperature range, the milk develops proper microfoam without scorching. Most baristas aim for around 155 degrees. Use a thermometer to dial in your technique, and remove the pitcher from the steam wand once you reach 160 degrees to prevent overheating, which breaks down the foam and creates a thin, watery texture.
How do I steam milk without a steam wand?
Three manual methods work well: an immersion blender submerged in heated milk creates microfoam in 30-60 seconds; a jar with a tight lid shaken vigorously for 1-2 minutes traps steam and creates froth; or a whisk in a small saucepan over medium heat takes 3-4 minutes of continuous whisking. Each method requires cold milk to start and produces different bubble sizes, so experiment to find your preference.
Why does my milk froth have large bubbles instead of microfoam?
Large bubbles form when the steam wand sits too high on the milk surface or when you move the pitcher too quickly. To fix this, submerge the steam wand tip just below the surface and create a gentle whirlpool by angling the pitcher slightly. Keep the wand in the same position as the milk level drops. If bubbles persist, your milk may be too warm, always start with cold milk straight from the refrigerator.